
There are two major shadow styles that work well on scarves product photography: natural shadows and drop shadows. Each of these styles can provide a different aesthetic in your product images, so choose wisely, but don’t fret about making the “wrong” choice. Each shadow style is unique and can equally serve to boost your products’ appeal to customers. There is no universally “proper” choice. The only absolute is this: once you select a shadow style, use it on every single product image that you create to keep your online inventory consistent.
This tutorial provides a step by step guide about how to correctly create and edit each of the major shadow types in Photoshop. However, before we get into the details, let’s discuss alignment.
Consistency is Key
Keep in mind that it’s very important that every product photo throughout your entire product inventory looks like it belongs with all the rest. This means that, as you light, photograph, and edit your imagery, you need to prioritize consistency. If you develop a detailed set of standards that you will use to create every product image, your product pages will look clean and professional and most notably, your customers will have better online shopping experiences on your website.
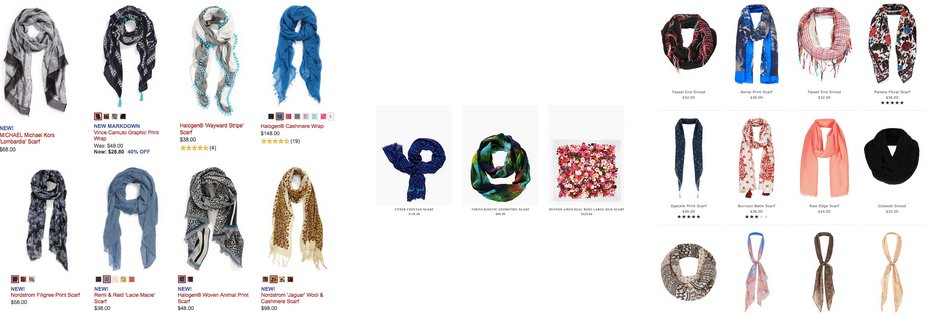
It is particularly critical to size and align images consistently. Take a look at the product pages in the following three screenshots. Notice that every product photo looks identical and allow yourself to explore how this affects your overall impression of these websites and companies.
Shadow Style #1: Natural Shadow
Natural shadows are great if you’re going for a subtle and consistently sophisticated aesthetic. If done correctly, natural shadows can be incredibly becoming!
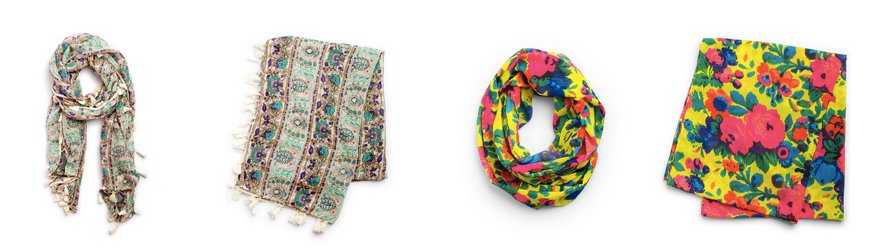
These are a couple examples of natural shadow on scarves
You should only need one light source during your photoshoot to capture adequate natural shadows, but reflectors are always useful tools for softening up these shadows if need be.
- Create a new layer and fill it with a white background.
- Move your newly-created white layer to the bottom of the layer stack.
- Duplicate the scarf layer that you have two scarf layers.
- Make a tight selection around just the scarf and refine your selection’s edges to be less harsh.
- Create a mask from your selection. Depending on whether you select the background or the scarf itself in your selection, you may need to invert your mask to make sure that the scarf is what shows instead of the background.
- Change the duplicate scarf layer to “multiple” in the top left tab of the layer dialog box.
- Create a mask layer on your middle scarf multiplied layer and Pixelz by brushing away the background except the shadow under the scarf. Use a feathered brush to keep everything smooth.
- Flatten your layers.
Shadow Style #2: Drop Shadow
Drop shadows will definitely spice up your product images. Drop shadows are unique in that they imitate shadows created by direct sunlight from above, as if the product is lying flat on a table. Scarves should always be photographed lying flat on a surface and this should be your go to shadow option for all your scarves. It is clean, consistent and incredibly fast and easy. It will make all your product images look its’ best.
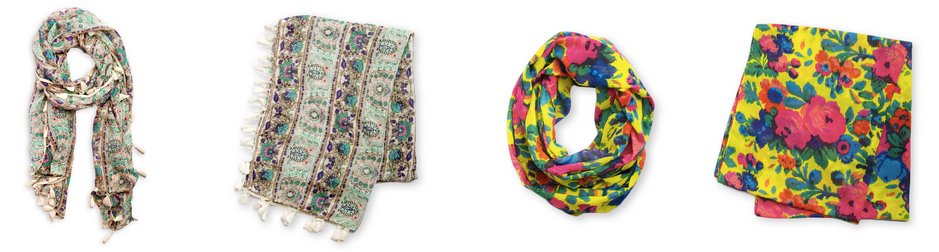
These scarves have already a drop shadow on. Don´t they look attractive?
You can learn how to utilize the drop shadow technique by watching this video tutorial and adhering to the written instructions that follow:
- Create a new layer and fill it with a white background.
- Move your newly-created white layer to the bottom of the layer stack.
- Make a tight selection around just the scarf and refine your selection’s edges to be less harsh.
- Create a mask from your selection. Depending on whether you select the background or the scarf itself in your selection, you may need to invert your mask to make sure that the scarf is what shows instead of the background.
- Double click the purse layer so that the “Layer Style” window pops up.
- Check the “drop shadow” box. A shadow will appear.
- Tweak the opacity of the shadow until it best suits your aesthetic preferences.
- Change the angle in which the shadow falls until it matches the direction of light that you can see on the product. Pay special attention as well to the distance from the shadow to your product and the size of the shadow. All of these will be determined by the direction, distance, and angle of your light source.
- Select “OK.”
- Tweak your selection mask so that you can’t see anything from the original background.
- Flatten the layers.
These shadow techniques can work wonders in your product photography, providing customers with improved online viewing and shopping experience that will encourage them to buy your products and have them coming back time and time again. Adding shadows may seem like an inefficient use of your time, but trust us: losing a few minutes here and there is a small price to pay for a professional online product inventory. Remember that great product images mean ultimately, more sales!


